
How Much Do Pot Lights Installation Really Cost in Ottawa?
Real Ranges, No Fluff (2026)
- 15 min read
- Published on:
- Updated on: May 19, 2026
- 15 min read
- Published on:
- Updated on: May 19, 2026
You searched “pot lights cost” because you want a straight answer. We respect that.
Here’s the short version: most Ottawa homeowners pay $100 to $250 per light, installed. Total project cost usually falls between $500 and $3,000 depending on how many lights you want and how easy (or hard) it is to access your ceiling.
But that range is wide. A 6-light kitchen job in a home with attic access is a very different project than 6 lights in a finished basement with no crawl space. The rest of this guide breaks down exactly what makes one quote $1,200 and another $4,000 — so you can spot a fair price when you see one.
We’re Ottawa Electric — a local electrical team with 15+ years installing pot lights across Ottawa, Kanata, Orleans, and Barrhaven. The prices and advice in this guide come straight from real projects we’ve completed in homes like yours.
The Real Cost Per Light in Ottawa (2026)
Let’s start with the number everyone wants. Based on local Ottawa pricing, here’s what you should expect to pay per pot light, fully installed:
| Scenario | Cost Per Light | What’s Included |
|---|---|---|
| Basic install (attic access, existing circuit) | $100 – $150 | LED fixture, wiring, cutout, connection |
| Standard retrofit (finished ceiling) | $150 – $200 | Retrofit housing, fishing wire, patching |
| Complex install (no access, new circuit) | $200 – $300 | New wiring run, drywall repair, dimmer |
| Bathroom / wet location | $200 – $300+ | Wet-rated fixture, GFCI, vapour seal |
These numbers come from hundreds of pot light projects we’ve completed across Ottawa. They also line up with industry-wide Ontario benchmarks, which put basic installs at $90 to $200 per light. When access is easy and wiring is in place, costs land at the lower end. When retrofits, new circuits, or drywall repairs are involved, they climb toward the higher end.
The takeaway? If someone quotes you $80 per light for a retrofit, ask what’s missing from the scope. If someone quotes $350 per light for straightforward attic access, ask why.
Seven Things That Change Your Final Price
This is where most homeowners get surprised. The fixture itself is rarely the expensive part. It’s everything around it that shifts the cost up or down.
1. Ceiling Access

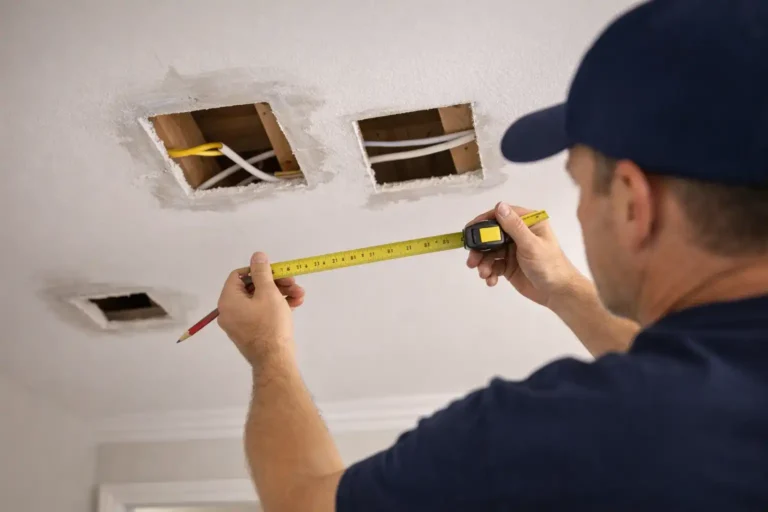
This is the single biggest factor. If your electrician can reach the installation point from an attic or unfinished space above, the work goes faster and costs stay lower. If your ceiling is finished on both sides — think a main-floor ceiling below a second storey — the electrician has to use retrofit housings and fish wires through tight cavities. That takes more time, and time is money.
2. Drywall and Paint Repair

Retrofits mean cutting holes. Sometimes those holes need to move because of hidden joists or rafters. When that happens, you're looking at drywall patching, sanding, and repainting. Some electricians include minor patching in the quote. Others don't. Always ask.
3. Insulation and Vapour Barrier

Ottawa ceilings typically have insulation above them — and a vapour barrier you don't want to compromise. That's why IC-rated (insulation-contact) and AT-rated (airtight) fixtures aren't optional here. They're required when insulation is present. Cheaper, non-rated fixtures can create fire risks and moisture problems. We always use IC/AT-rated fixtures and reseal the vapour barrier to maintain your home's energy envelope.
4. New Circuits vs. Existing Wiring

If your current circuit can handle the new lights, great. If it can't — or if you're adding lights to a room that doesn't have overhead wiring yet — your electrician needs to run a new circuit from the panel. That adds $200 to $500+ to the project, depending on distance.
5. Dimmers and LED Compatibility

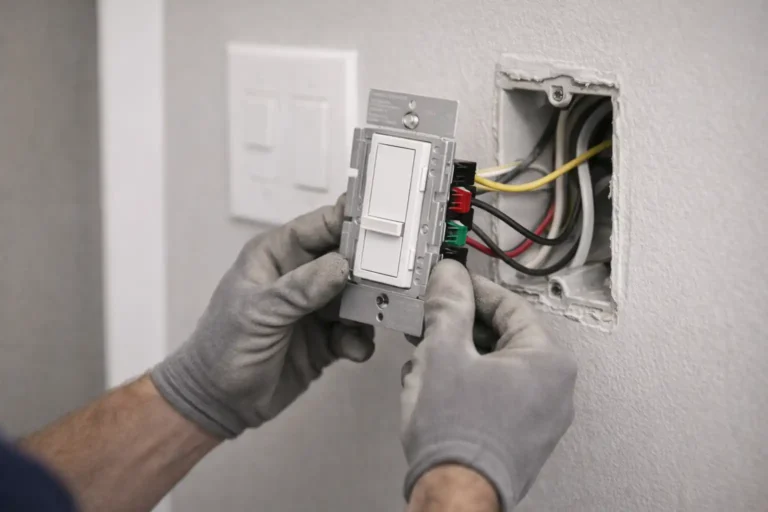
A basic toggle switch costs less than a dimmer. But most homeowners want dimmers for pot lights — and rightly so. The catch? Not all dimmers play nicely with LEDs. A mismatched dimmer causes flickering, buzzing, or lights that won't dim below 30%. A good electrician will match the dimmer to the specific LED fixture to avoid headaches later.
6. Wet or Damp Locations

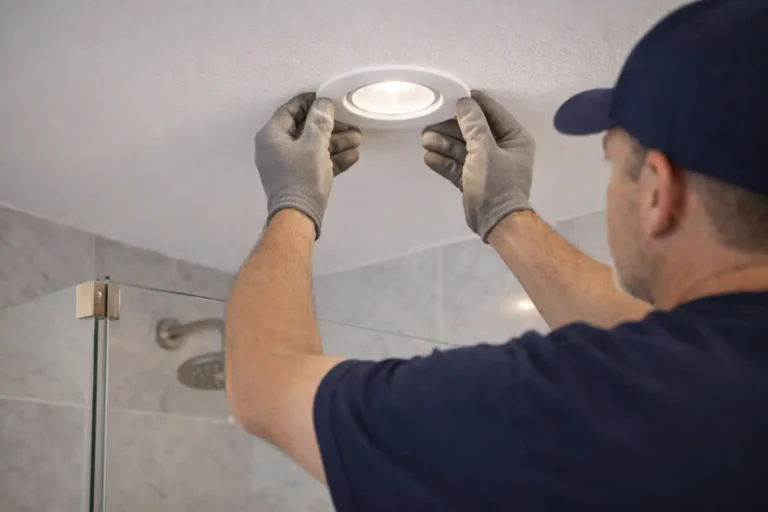
Bathrooms, showers, covered porches, and soffits need fixtures rated for wet or damp environments. These cost more and take longer to install because of waterproofing and GFCI requirements.
7. The "Small Job" Premium

Installing 2 pot lights takes almost as long to set up as installing 6. Your electrician still has to load the van, drive to your home, set up tools, and run at least one circuit test. That's why the per-light cost tends to drop when you install more lights at once. Six to twelve lights is the sweet spot for value.
We give free, no-pressure estimates for pot light projects across Ottawa. Tell us about your space and we’ll give you a real number.
Same-Day Quote
Pot Light Cost Estimator
Use this quick tool to get a ballpark range for your project. Pick your scenario, choose how many lights you need, and see an estimated total. This isn’t a quote — it’s a starting point for your planning.
Select your scenario, then choose how many lights.
*Ballpark only. Actual cost depends on your home. Get an exact quote from our team.
Why One Quote Is $1,200 and Another Is $4,000
If you’ve collected two or three quotes that look wildly different, you’re not alone. This is the most common frustration we hear from Ottawa homeowners. The issue usually comes down to scope — what’s included and what’s not.
Here’s what often explains the gap:
- Patching and painting. Some quotes include drywall repair. Others leave that to you.
- Dimmer switches. A quality LED-compatible dimmer costs $40 to $80. Multiply that by three rooms and it adds up.
- Circuit capacity. The cheaper quote might assume existing wiring can handle the load. The more expensive quote includes a new dedicated circuit.
- Fixture quality. A $15 Amazon pot light isn’t the same as a $40 supply-house fixture with a proper driver and 5-year warranty.
- Permits and inspections. In Ontario, electrical work generally requires an ESA-approved process. Some quotes factor in permit costs. Others don’t mention them at all.
The cheapest quote isn’t always the best deal. And the most expensive quote isn’t automatically the safest choice. What matters is that every line item is spelled out so you’re comparing apples to apples.
Where Your Money Actually Goes
People assume most of the cost is the fixture. It’s not. Here’s how a typical 8-light retrofit project breaks down in Ottawa:
Labour is by far the largest piece. That’s normal for skilled electrical work. The real question isn’t “why is labour so expensive?” — it’s “is the electrician qualified and thorough enough to do the job right the first time?”
Browse our recent pot light installs across kitchens, basements, and living rooms — with before-and-after photos from real local projects.
Same-Day Quote
LED Pot Lights: The Long-Term Math
Almost every pot light we install today is LED. And for good reason. The upfront cost is slightly higher than older halogen fixtures, but the operating savings start immediately.
LED pot lights use 80% to 90% less energy than halogen equivalents. They produce far less heat, which matters when your fixtures are surrounded by insulation. And they last 25,000 to 50,000 hours — meaning you won’t be replacing bulbs every year.
Here’s what the savings look like for a typical Ottawa kitchen with 12 pot lights, based on current Hydro Ottawa rates:
| Halogen (50W each) | LED (9W each) | |
|---|---|---|
| Total wattage (12 lights) | 600W | 108W |
| Daily use (5 hours) | 3.0 kWh | 0.54 kWh |
| Annual energy cost* | ~$130 – $165 | ~$25 – $35 |
| Yearly savings with LED | $95 – $130 per year | |
*Based on Hydro Ottawa time-of-use rates (effective Nov 2025): off-peak 9.8¢/kWh, mid-peak 15.7¢/kWh, on-peak 20.3¢/kWh.
That means LED pot lights pay for themselves within the first year or two. After that, the savings keep compounding. We wrote a deeper comparison in our guide to LED vs. halogen pot lights for Ottawa homes if you want the full breakdown.
Warm vs. Cool: Why Some Pot Lights Look "Off"
This is one of the most overlooked decisions in a pot light project. You get the fixtures installed, flip the switch, and the room looks like a dentist’s office. It happens when the colour temperature is wrong.
Colour temperature is measured in Kelvin (K). Here’s the cheat sheet:
| Colour Temperature | Feel | Best For |
|---|---|---|
| 2700K (Warm White) | Cozy, golden, relaxed | Living rooms, bedrooms, dining rooms |
| 3000K (Soft White) | Clean, bright, welcoming | Kitchens, hallways, bathrooms |
| 4000K+ (Cool / Daylight) | Crisp, clinical, energetic | Garages, workshops, task areas |
For most Ottawa homes, we recommend 3000K in kitchens and 2700K in living spaces and bedrooms. If you want one temperature throughout, 3000K is the safest choice — warm enough to feel comfortable, bright enough for tasks. Avoid 4000K and above unless it’s a workshop or utility space. That blue-white light creates a harsh feel that most people regret.
Some newer LED fixtures offer “dim-to-warm” technology, where the light shifts from 3000K at full brightness down to 2200K when dimmed — mimicking the warmth of an old incandescent bulb. It’s a nice touch that adds maybe $5–$10 per fixture.
Our team can walk through your space, recommend the right layout, and give you a clear, all-in price — no surprises.
Same-Day Quote
What to Look for in a Pot Light Quote
Before you sign off on any quote, make sure it covers all the major items. Use this checklist when comparing electricians. A thorough quote should include every item below — or at least explain why something isn’t needed for your specific project.
Your Quote Comparison Checklist
Copy this list and send it to every electrician you’re considering. A good contractor will answer every line item without hesitation. If someone can’t (or won’t) break down their quote, that tells you something. When you request a quote from our team, you’ll receive a detailed scope that covers all of these items.
IC-Rated, Airtight, Vapour Barrier: What It All Means
These terms sound technical, but they matter more in Ottawa than in most cities. Our homes are built to handle cold winters, which means thick insulation and vapour barriers in every ceiling that separates heated space from unheated space.
When you cut a hole for a pot light, you’re cutting through that protective layer. If the fixture isn’t rated to touch insulation safely, you create a fire hazard. If it isn’t airtight, you lose heated air into the attic and invite moisture problems.
Here’s what each rating means:
- IC-rated (Insulation Contact) — the fixture can be safely buried in insulation without overheating. Required by code whenever insulation is present.
- AT-rated (Airtight) — the fixture prevents warm, moist air from passing through the ceiling into cold spaces above. This protects against condensation and ice dam issues.
- Wet-rated — the fixture is sealed against water contact. Required for showers, open porches, and soffits.
In Ontario, electrical products must generally meet approval requirements under the Ontario Electrical Safety Code. That means you shouldn’t buy random unbranded fixtures off a marketplace and expect them to pass inspection. Always choose approved, rated products from reputable suppliers.
"We've seen homeowners install cheap retrofit lights that aren't IC-rated and then pile insulation on top. That's a fire risk that doesn't show up until something goes wrong. Spending an extra $10 per fixture on proper ratings is the easiest safety decision you'll ever make."
— Ottawa Electric Team
What Size Pot Lights Do You Need?
Most Ottawa homes use 4-inch or 6-inch pot lights. The right choice depends on your ceiling height, room size, and how you want the light to feel.
4-inch pot lights produce a focused beam. They work well as accent or task lighting — over a kitchen counter, along a hallway, or highlighting artwork. Because the beam is narrower, you typically need more of them to light a room evenly.
6-inch pot lights throw a wider beam and cover more area per fixture. They’re the go-to choice for general room lighting in living rooms, basements, and kitchens. Fewer fixtures needed means lower total project cost.
For spacing, a simple rule works well: divide your ceiling height by 2. That gives you the approximate distance between lights in feet. So a room with 8-foot ceilings should have pot lights spaced about 4 feet apart. A 9-foot ceiling gets roughly 4.5-foot spacing.
Quick Spacing Formula
Ceiling height ÷ 2 = spacing between pot lights (in feet). For an 8-foot ceiling, space lights about 4 feet apart. For a 10-foot ceiling, about 5 feet apart. Adjust based on the room's layout and how much light you want.
Can You Install Pot Lights Yourself in Ontario?
This question comes up a lot, so let’s address it directly.
In Ontario, homeowners are legally allowed to do electrical work in their own homes. However, you still need to file an ESA permit before starting and have the work inspected afterward. That applies whether a licensed electrician does the work or you do.
That said, pot light installation involves working with live circuits, cutting into ceilings, and ensuring proper ratings for insulation contact and airtightness. A mistake here isn’t a cosmetic issue — it’s a safety risk. For most homeowners, the cost of hiring a licensed electrician is well worth the peace of mind.
What you can do yourself: plan your layout, choose your fixture style, pick your colour temperature, and decide on dimmer preferences. Bring all of that to your electrician and you’ll save time (and money) on the consultation.
FAQs
How many pot lights do I need for a kitchen?
Most Ottawa kitchens (100–150 sq ft) need 6 to 10 pot lights for even coverage. Use the ceiling height ÷ 2 formula for spacing, and add extra lights over the island, sink, and countertops where task lighting matters most.
Do pot lights increase home value?
Yes. Modern recessed lighting is one of the most cost-effective upgrades you can make before selling. It makes rooms feel larger and more modern, which appeals to buyers. Real estate agents consistently list updated lighting among their top staging recommendations.
How long does pot light installation take?
A single room typically takes 3 to 5 hours. A full-home installation (multiple rooms, new circuits) can take 1 to 2 days. Projects with easy attic access go faster than retrofits in finished ceilings.
Is it cheaper to install pot lights during a renovation?
Absolutely. If the ceiling is already open during a renovation, your electrician doesn’t need to fish wires or repair drywall. That can reduce the per-light cost by 30% to 50% compared to a standalone retrofit project.
What brand of pot lights does Ottawa Electric use?
We use professional-grade, IC/AT-rated LED fixtures from trusted electrical suppliers. The specific brand depends on your project’s needs — we match the fixture to your ceiling type, dimmer setup, and colour temperature preference. Every fixture we install is approved for use in Ontario.
Share on Social Media:
Hey! I’m Matt Fortin, Founder & Master Electrician of Ottawa Electric. I have 20+ years of electrical industry experience across residential, commercial, and heavy industrial work. I lead our team with a focus on safety, quality workmanship, and clear communication.
Table of Contents
Ready to Light Up Your Home?
Join hundreds of Ottawa homeowners who trust Ottawa Electric for professional pot light installations. Certified electricians. Fair pricing. Beautiful results.
Same-Day Quote